How To Identify And Treat Common Pests In Your Vegetable Garden

Ready to stop tiny pests from ruining your hard-earned vegetable harvest? In this guide, you'll discover how to spot common garden pests early and treat them safely, without harmful chemicals. You'll walk away with a simple, actionable plan to keep your plants healthy all growing season.
Why should you care about learning garden pest identification and treatment? Catching pests before they spread can save you from losing entire rows of tomatoes, lettuce, or squash this year. But it's important to understand the right approach, so you don't harm beneficial insects or your plants in the process.
Why Learning to Identify and Treat Common Garden Pests Is Worth Your Time
- Low-effort, high-reward protection: You don't need fancy tools or expensive products to stop most pests, and a few minutes of weekly checks can prevent months of lost work.
- Safe, eco-friendly options for all garden types: You can choose treatment methods that work for raised beds, container gardens, or in-ground plots, even if you grow food for your family.
- Improved harvest yields year after year: When you manage pests effectively, you'll get more usable produce from every plant, making your gardening time far more productive.
- Build transferable gardening skills: The pest identification habits you learn here apply to flower gardens, herb beds, and fruit bushes too, expanding your overall gardening knowledge.
- Avoid unnecessary chemical exposure: Many beginner gardeners reach for harsh sprays first, but you'll learn gentle alternatives that keep pollinators like bees safe in your yard.
Step-by-Step Guide to Identifying and Treating Common Vegetable Garden Pests
Step 1: Schedule 10-minute weekly garden checks
Walk through your garden at least once a week, flipping over leaf undersides and checking stem joints for signs of pests or damage. Look for holes in leaves, sticky residue, discolored spots, or the pests themselves, from tiny aphids to larger caterpillars. This early detection is the easiest way to stop small infestations from becoming big problems.
Pro tip: Check your plants in the early morning when many pests are most active and easier to spot.
Step 2: Match damage to the correct pest type
When you spot unusual damage, use a simple garden pest guide to match the signs to the pest responsible. For example, tiny holes in brassica leaves often come from cabbage worms, while curled, yellowed tomato leaves usually signal aphids. Misidentifying the pest can lead to using the wrong treatment that doesn't work and wastes your time.
Common mistake to avoid: Don't assume all leaf damage is from pests – some discoloration comes from nutrient deficiencies, so rule that out first.
Step 3: Start with the gentlest treatment option first
For small infestations, try physical removal first: pick off caterpillars by hand, spray aphids off with a strong stream of water, or place insect netting over vulnerable plants. These methods cost almost nothing, have no impact on beneficial insects, and work well for most minor pest issues. Only move to stronger treatments if physical methods don't slow the infestation after a few days.
Step 4: Apply targeted organic treatments if needed
If physical removal isn't enough, choose an organic treatment designed for your specific pest, like neem oil for aphids or Bt (Bacillus thuringiensis) for caterpillars. Follow the product instructions exactly, and apply treatments in the early evening when bees and other pollinators are less active to avoid harming them. Never apply treatments on windy days, as the spray can drift to nearby flowers or edible plants you plan to harvest soon.
Step 5: Introduce beneficial insects to your garden for long-term control
Add beneficial pest predators like ladybugs, lacewings, or praying mantises to your garden, or plant pollinator-friendly flowers nearby to attract them naturally. These insects feed on common garden pests without harming your vegetables, creating a balanced ecosystem that reduces future infestations. This step cuts down the amount of treatment you need to do in later growing seasons.
Step 6: Monitor and adjust your approach after treatment
Check your plants 24 to 48 hours after any treatment to see if the pest population is decreasing. If you still see lots of active pests, try a different treatment method or adjust how often you apply your current product. If the infestation is limited to one or two plants, remove those plants entirely to stop the pests from spreading to the rest of your garden.
Step 7: Clean up garden debris at the end of the growing season
After you harvest your last vegetables, remove all dead plant material, fallen leaves, and old mulch from your garden beds. Many pests overwinter in this debris, so clearing it out reduces the number of pests that will emerge in the next growing season. This simple step cuts your pest management work in half for the following year.
Challenges to Be Aware Of
- Confusing beneficial insects with harmful pests: Many beginner gardeners accidentally kill ladybugs or lacewings because they don't recognize them as pest predators. Take time to learn the most common beneficial insects in your area before you remove any bug from your garden, and use a simple identification app if you're unsure.
- Treating pests too late in the infestation cycle: If you wait until an entire plant is covered in pests, even strong treatments may not save it, and the infestation will likely spread to nearby plants. Stick to your weekly check schedule to catch issues early, and don't hesitate to remove badly damaged plants to protect the rest of your garden.
- Weather impacting treatment effectiveness: Rain can wash off sprays like neem oil within hours of application, and extreme heat can make some organic treatments less effective. Check the weather forecast before you apply any treatment, and reapply if it rains within 24 hours of your first application.
Conclusion
You now have the foundation to start identifying and treating common pests in your vegetable garden safely and effectively. With the simple steps outlined here, you don't need prior gardening experience to protect your plants and get a great harvest this year.
Learning garden pest control offers the chance to get far more value out of every hour you spend gardening, and by mastering these skills, you're positioning yourself for consistent, successful harvests for years to come.
Don't wait for the perfect moment. Start with your first 10-minute garden check today. The small amount of time you invest now will pay off with more fresh, homegrown vegetables for you and your family to enjoy.
FAQ
How long does it take to learn to identify common garden pests?
Most beginners can learn to spot the 5 to 10 most common pests in their region within 2 to 3 weeks of regular garden checks. Keep a simple photo guide on your phone to reference when you see an unfamiliar bug or type of damage. Start with the most common veggies you grow, and expand your knowledge over time.
Do I need expensive tools or chemicals to treat garden pests?
You don't need any special equipment to manage most common garden pests at home. A garden hose, a pair of gloves, and affordable organic products like neem oil or insecticidal soap work for 90% of common infestations. Many small issues can even be resolved with just hand removal and regular monitoring.
What's the best way to tell the difference between pest damage and nutrient deficiencies?
Pest damage usually appears as irregular holes, bite marks, or sticky residue on leaves, while nutrient deficiencies cause uniform discoloration like yellowing edges or purple veins across multiple plants. If you don't see any bugs or bite marks, test your soil to check for nutrient imbalances before you apply any pest treatments. Adjusting your fertilizer routine can often fix the issue faster than pest control products.
Can I use these pest control methods if I grow vegetables to sell at local markets?
Most of the organic treatment options outlined here are approved for use in small-scale commercial vegetable production, as long as you follow harvest waiting periods listed on product labels. Always keep records of what treatments you use and when, and check your local market rules for any additional restrictions. For extra peace of mind, stick to physical removal and beneficial insect control for crops you plan to sell.


RECOMMEND ARTICLES
How To Read Nutrition Labels To Identify Hidden Sugars: A Practical Guide For Everyone

How To Hang Heavy Pictures Without Damaging Your Walls: Complete Step-by-Step Guide
How To Paint Kitchen Cabinets For A Professional, Long-Lasting Finish

How To Master Basic Hand Sewing Stitches For Clothing Repair

How To Declutter Your Entire Closet In One Afternoon: A Practical Step-by-Step Guide

How To Make Perfect Sourdough Starter From Scratch: Step-by-Step Beginner Guide
How To Make Your Own Compost At Home Without The Smell: A Simple Step-by-Step Guide

How To Revive A Dying Houseplant: 5 Essential Steps For New Plant Owners
How To Create A DIY Vertical Garden For Small Balconies: A Beginner’s Step-by-Step Guide
How To Remove Hard Water Stains From Glass Shower Doors: A Simple, No-Harsh-Chemicals Guide
Most Read

How To Repair A Small Hole In Drywall: A Step-by-Step Beginner’s Guide
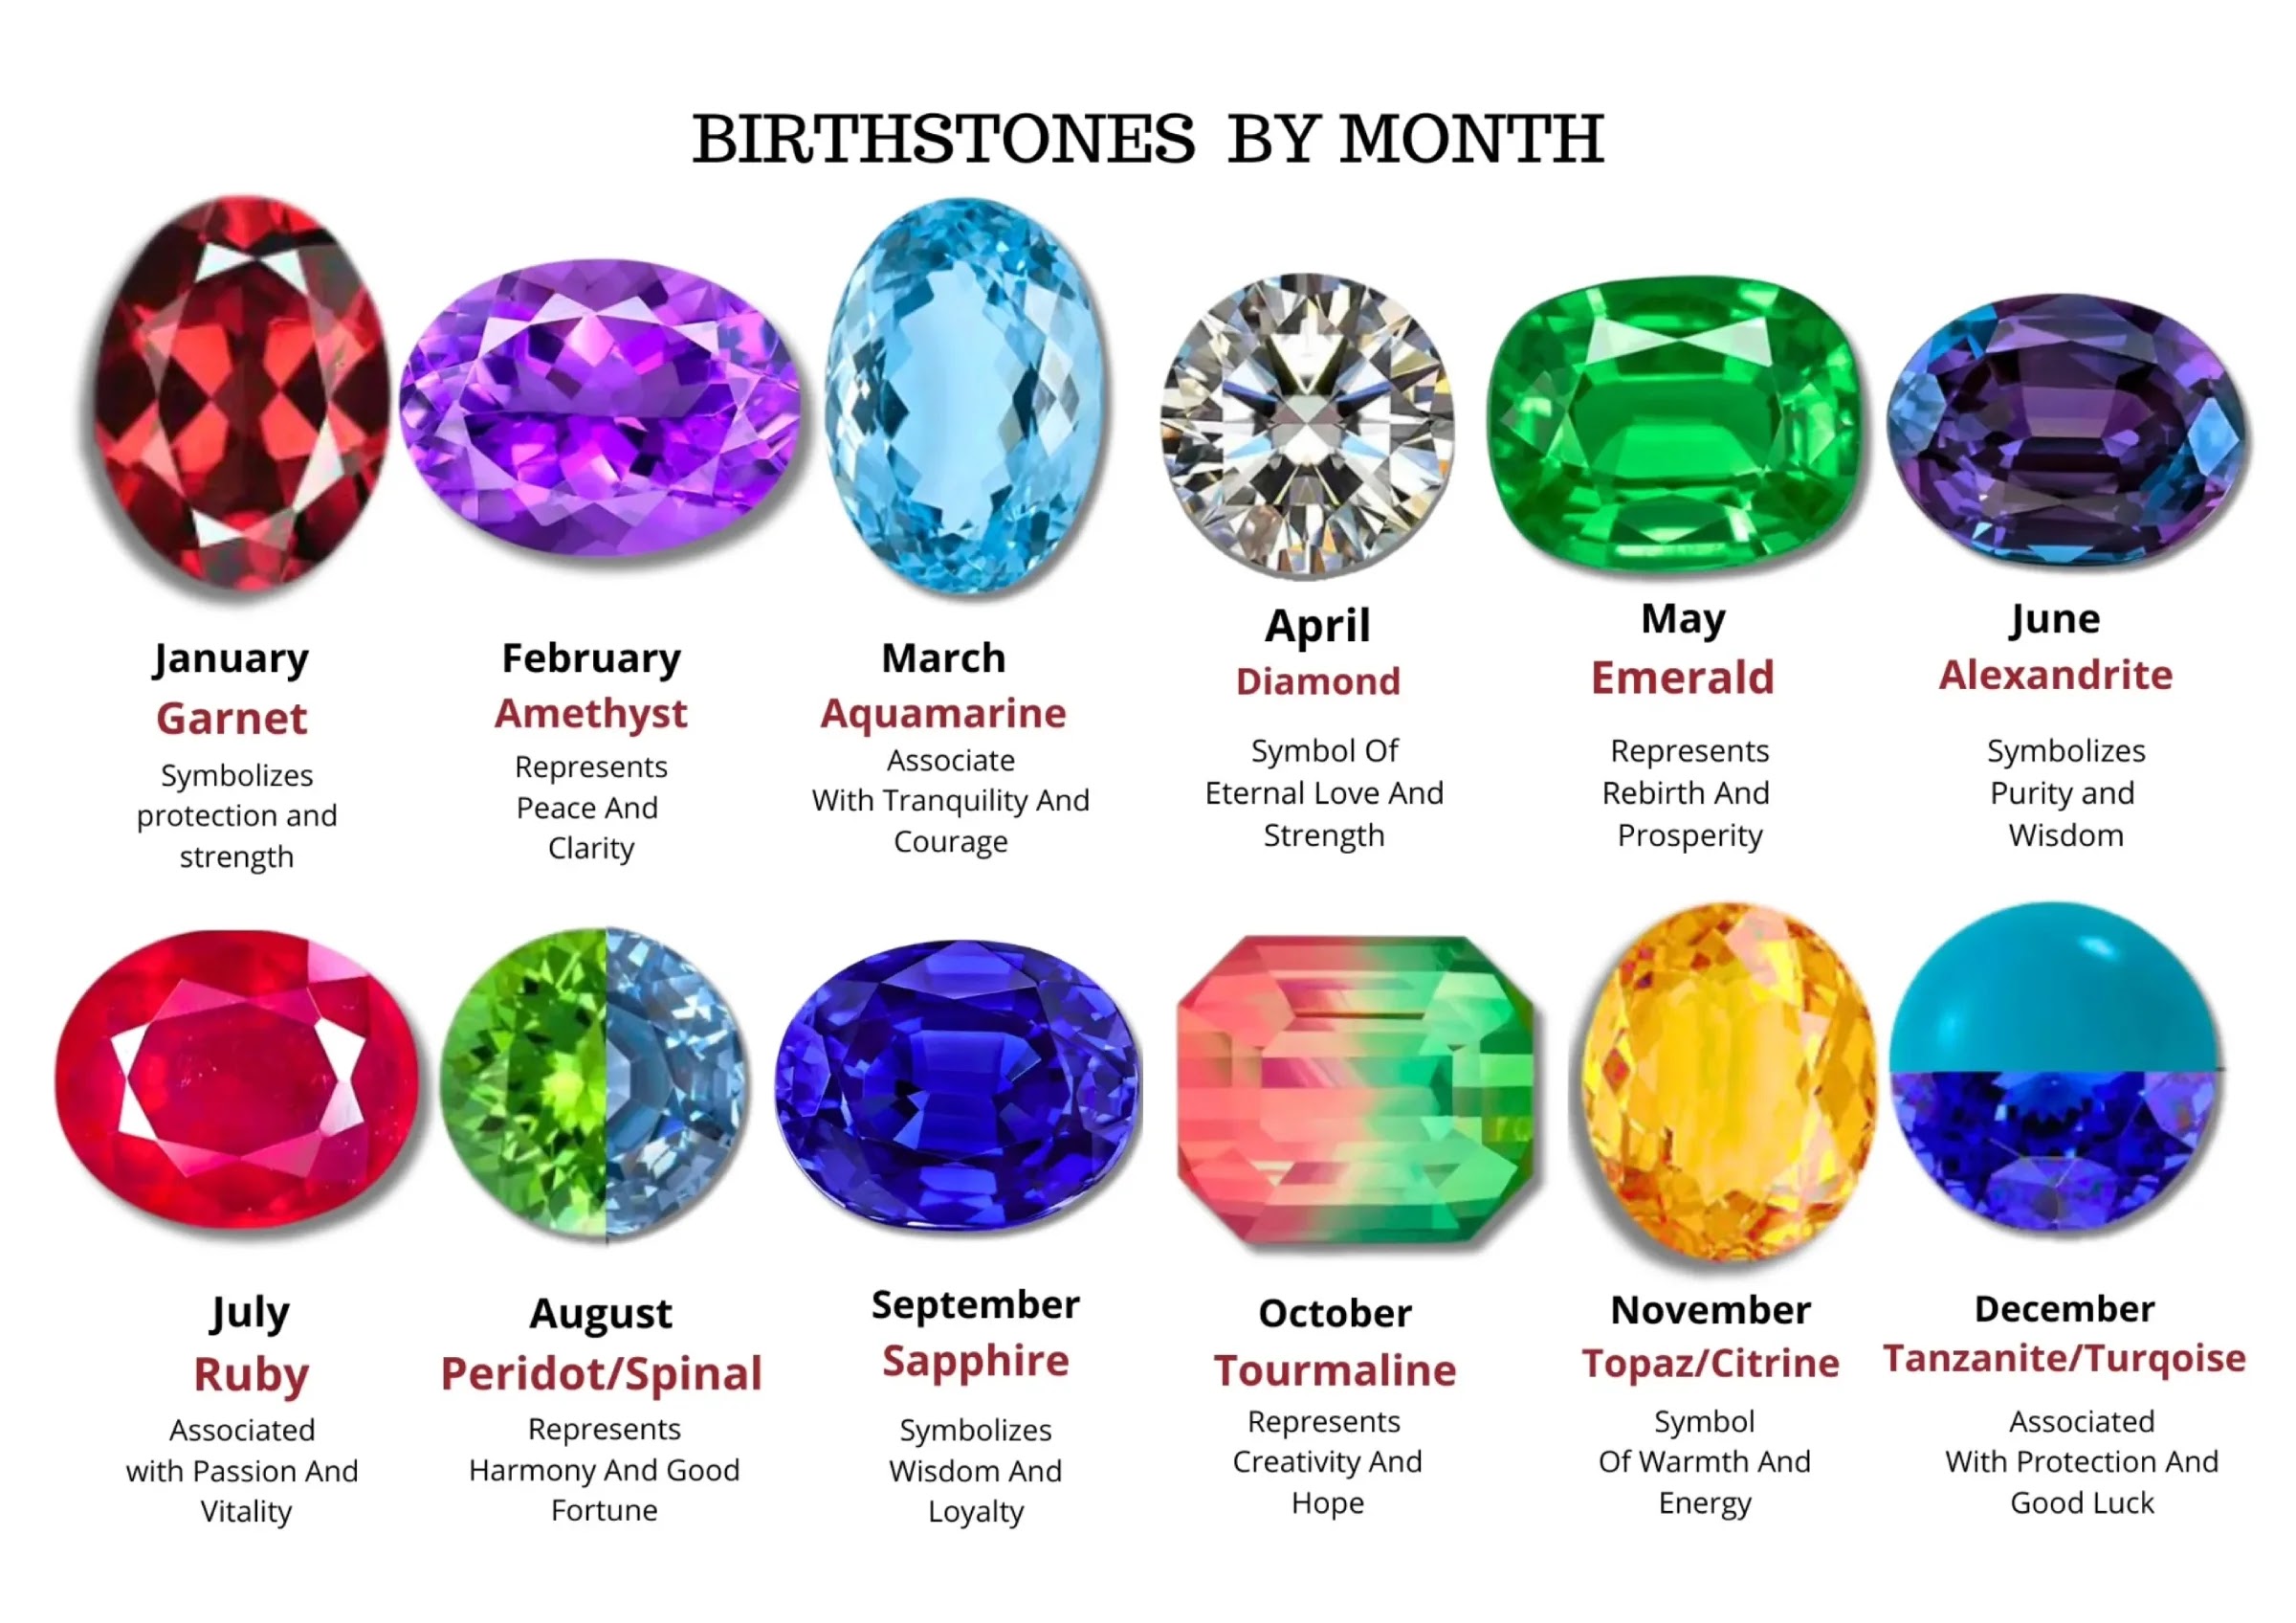
How To Uncover The Hidden Secrets Of Your Birthstone For Personal Insight
How To Claim And Use 99 Nights In The Forest Free Items

Find Out How To Earn Free Robux And Gift Codes To Upgrade Your Roblox Account
9 Signs That Indicate Mental Illness